EVERYTHING ABOUT ONLINE WEBCAM TESTING: STEPS AND TROUBLESHOOTING
For both private as well as work related interactions, webcams have become increasingly vital. Video conferencing is being used by more individuals than ever before to replace audio-only calls.
In the light of the global pandemic that the human race is facing, every aspect of life as we know it, has taken a dull stop. With the inevitable popularization of “Work from Home” culture, video conferencing and hence webcams have become an integral element of home office setup, be it for working professionals or students.
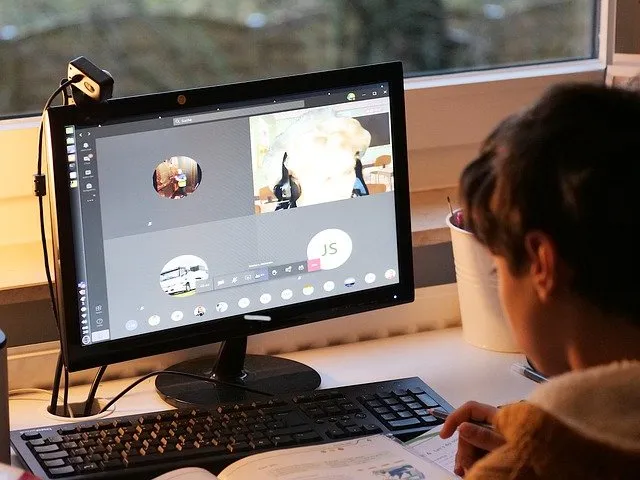
And, every webinar or online meeting requires excellent audio-video quality.
It is critical to be able to preview what your webcam will display to other users before starting a conference. Perhaps you want to make sure you look presentable or keep your cluttered bedroom out of sight. You might want to check the efficiency of your lighting or the quality of the image produced by your webcam. You should also do a webcam test and check your microphone to ensure that your event participants can see and hear you clearly.
How do I conduct a webcam test online?
- Open your web browser and go to testwebcams.com.
-
In the pop-up permission box that appears at the top of your window, click on Allow.
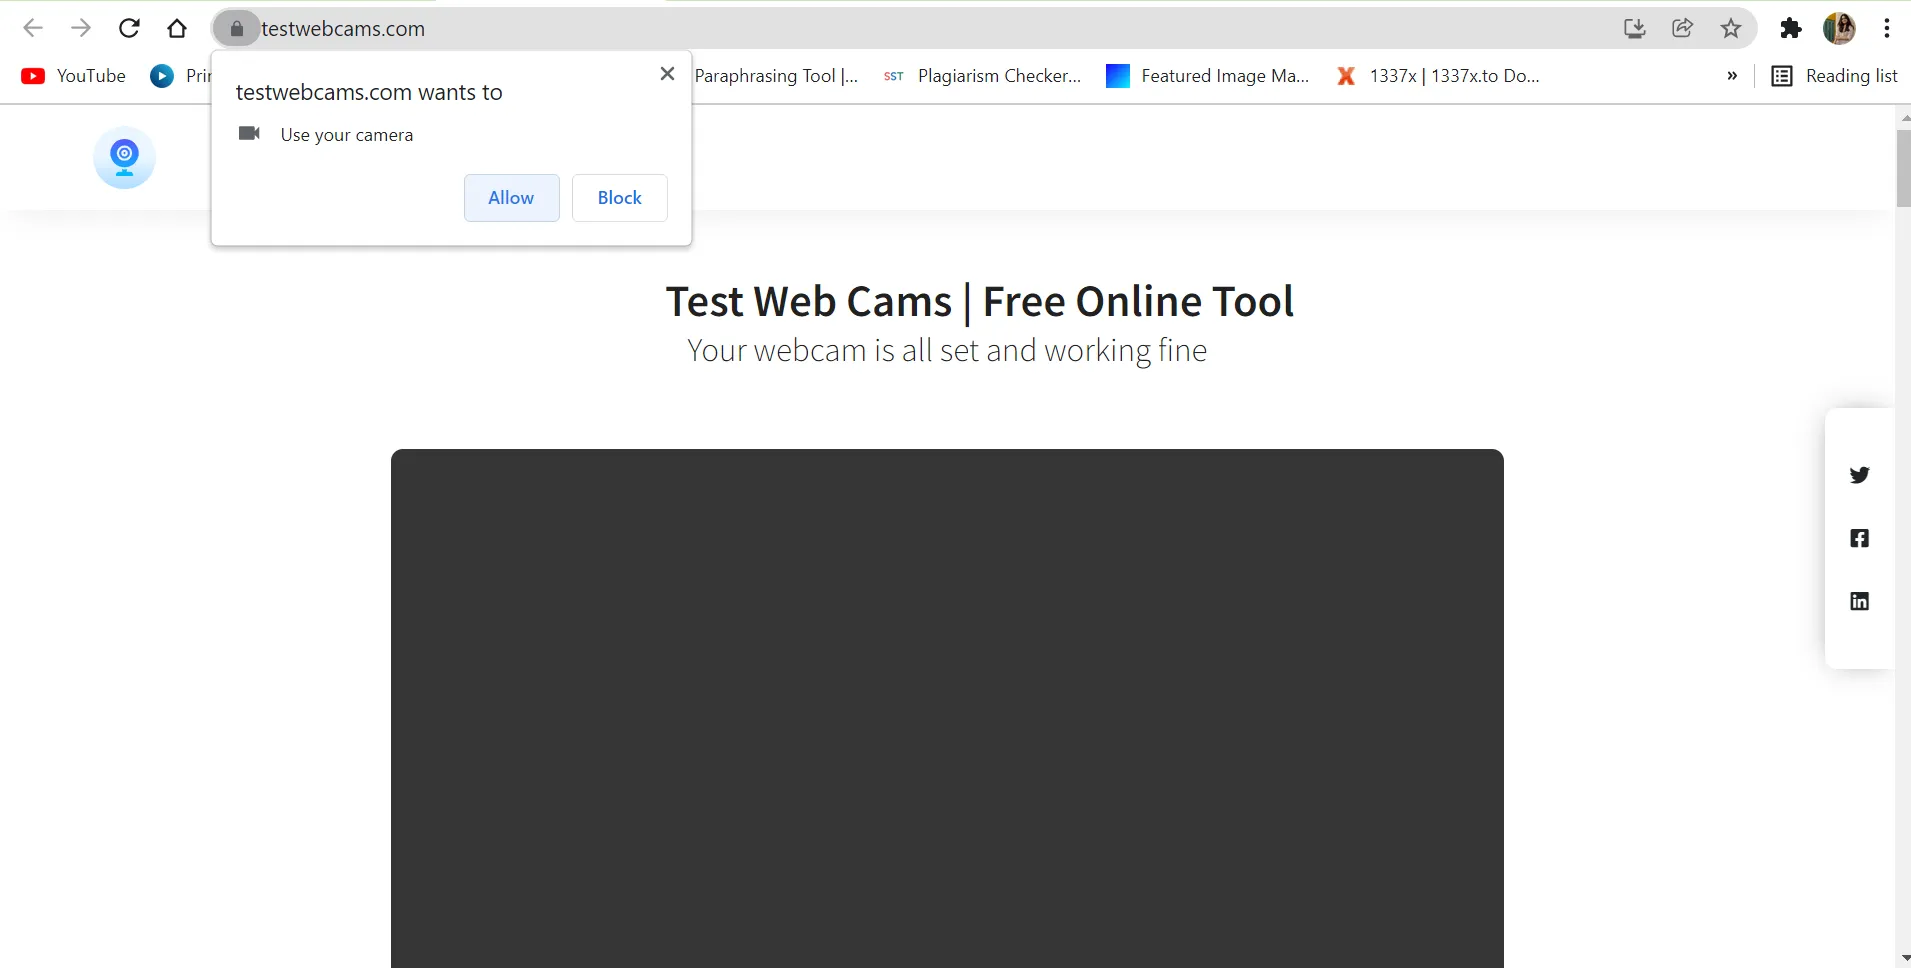
- Immediately, the video stream captured by your webcam will appear in real time on the website’s landing page.
-
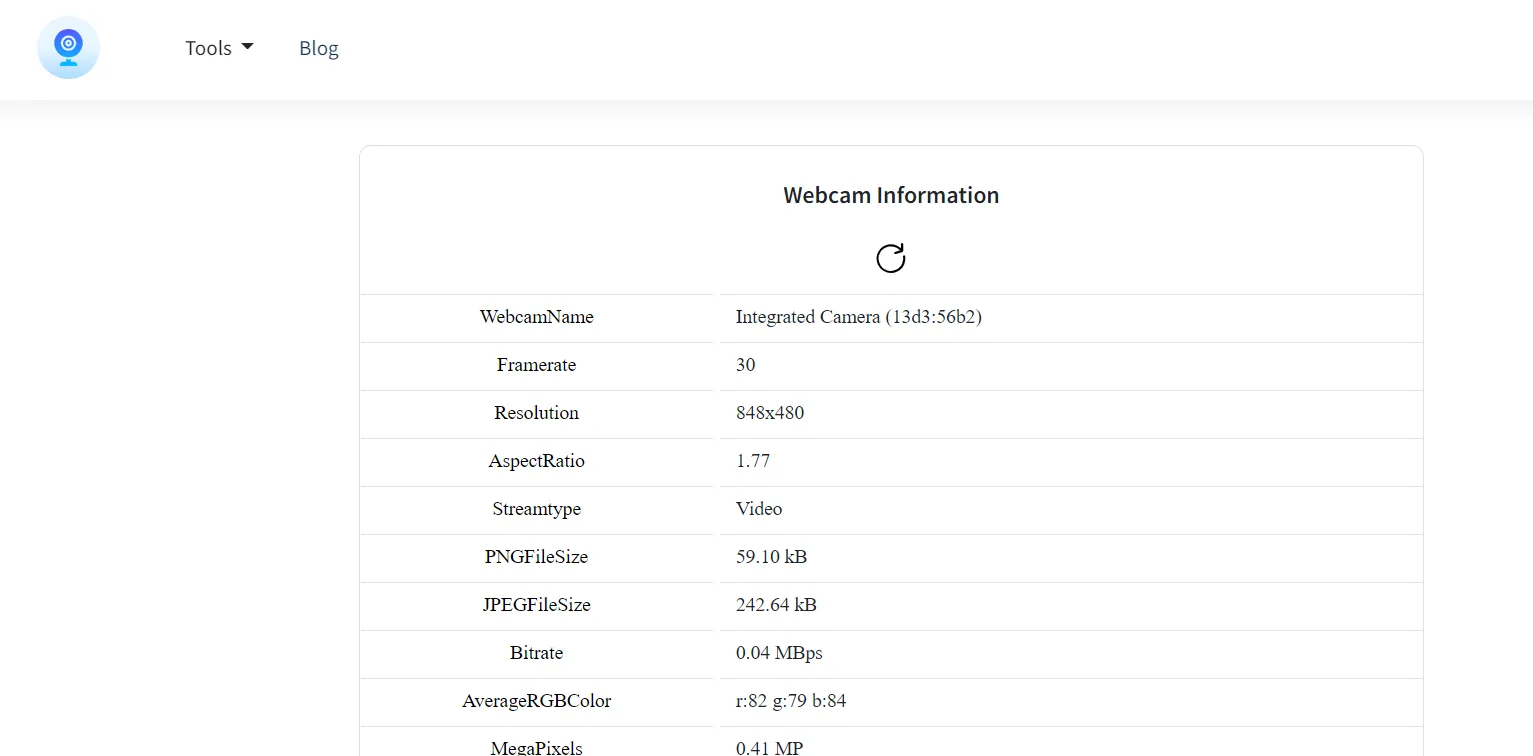
Scroll down to find the specifics of your webcam below it.
- If the webcam feed doesn’t appear press on the power button to turn it on.
Troubleshooting
If you find that your online webcam testing is not being carried out for some reason, here is what you can do.
If your webcam isn’t working with your preferred tool, try one of the following methods that best suits you problem to test the camera and get started:
Enable access to your webcam
- You might notice a multimedia icon with a red cross at the end of your browser’s address bar. Click on this icon and it will display the Camera Blocked window. You will find it reads a “This page has been blocked from accessing your camera” message.
-
So, in order to finish your online webcam test, you will need to do the following:
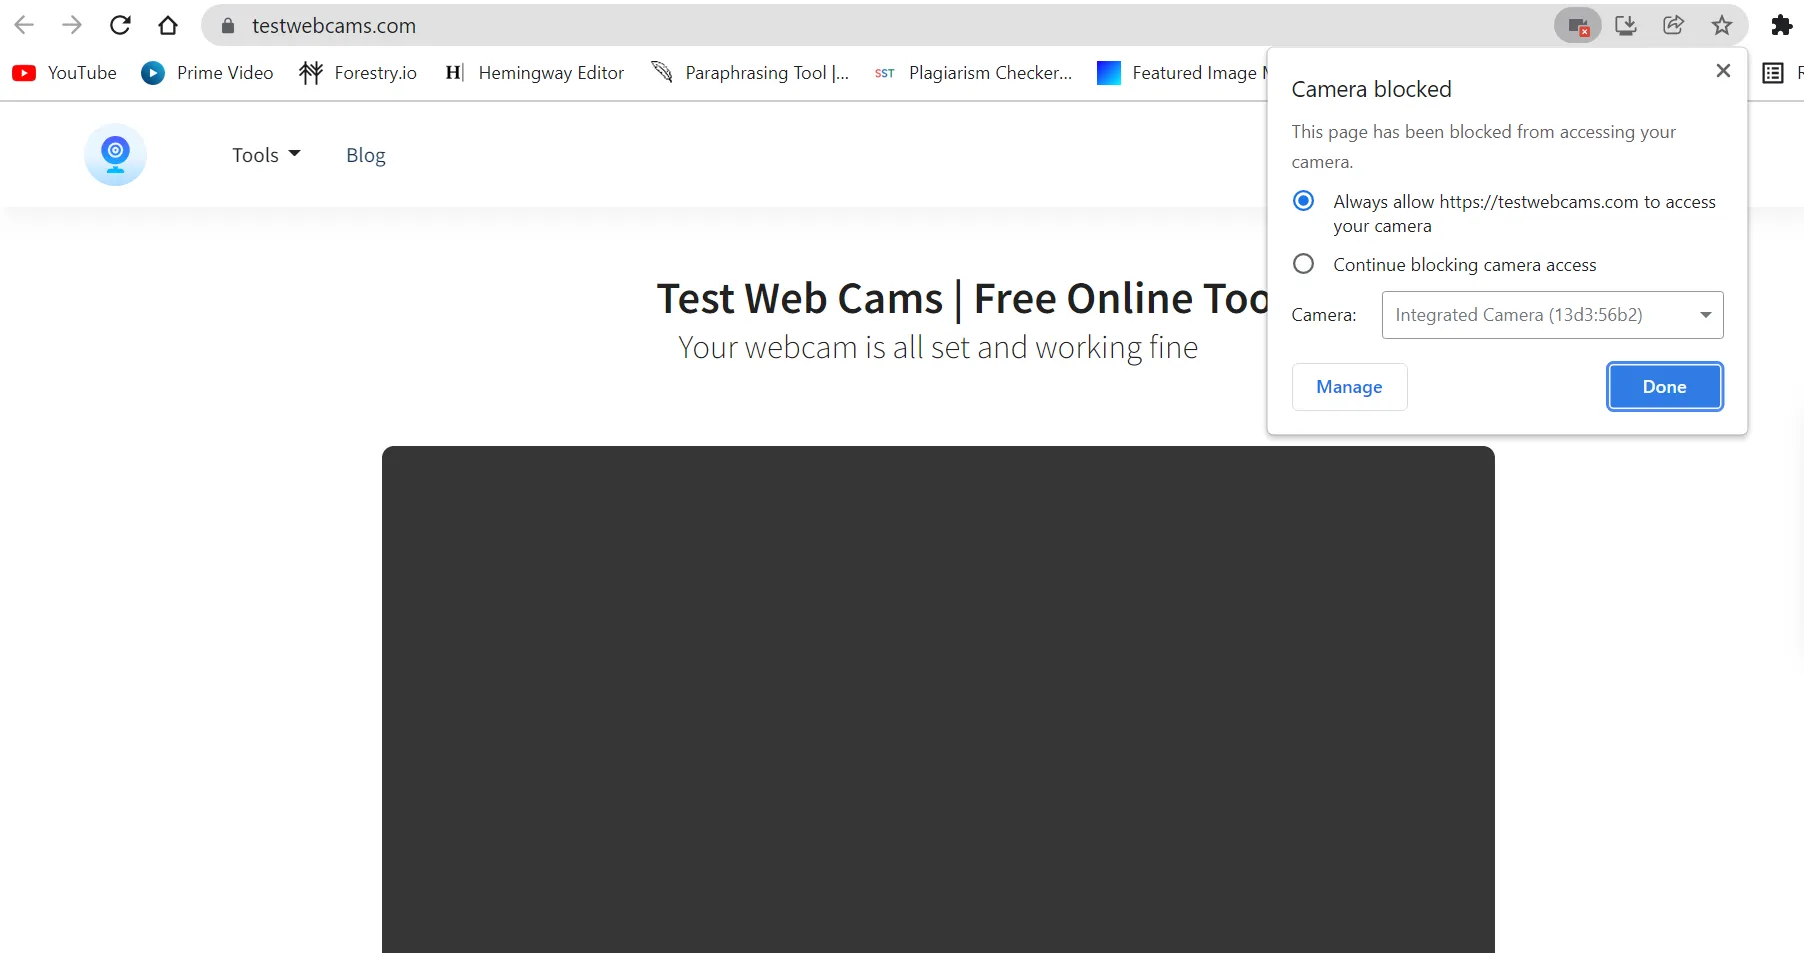
- Select the “Always allow https://testwebcams.com/ to access your camera” option present right below that message.
- Click on the Done button and then refresh your webpage.
If the same issue persists, perform the following steps to set up the desired camera and perform the webcam test:
-
Go to your browser settings. For instance, go to Chrome’s settings and type in “camera” in the search bar.
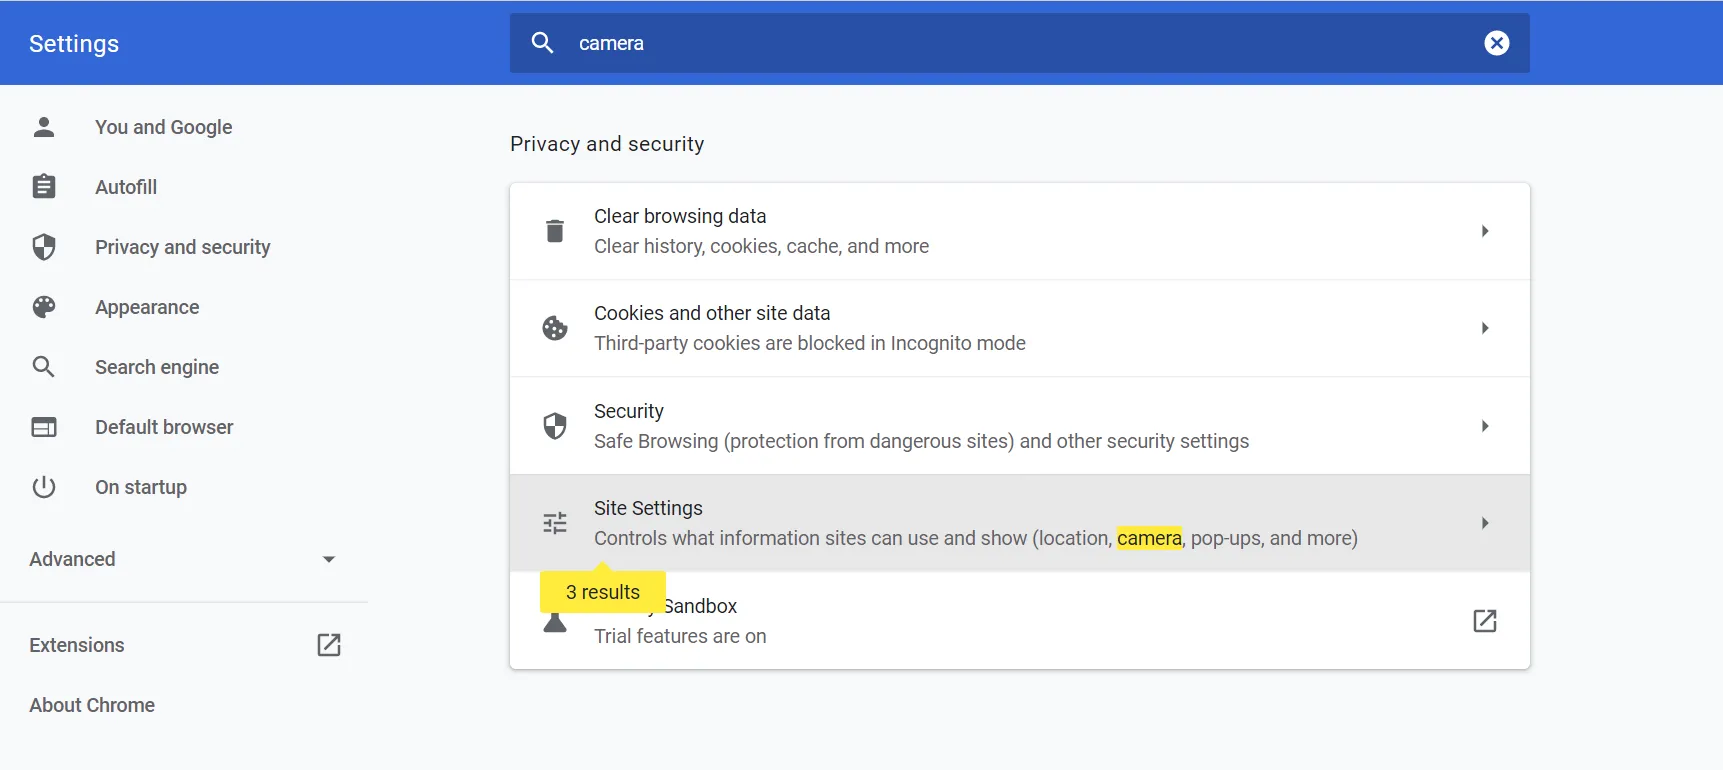
- Select Site Settings from the results that appear.
- Now click on the Camera option under the Permissions section.
-
Select the camera you want to use from the camera dropdown menu.
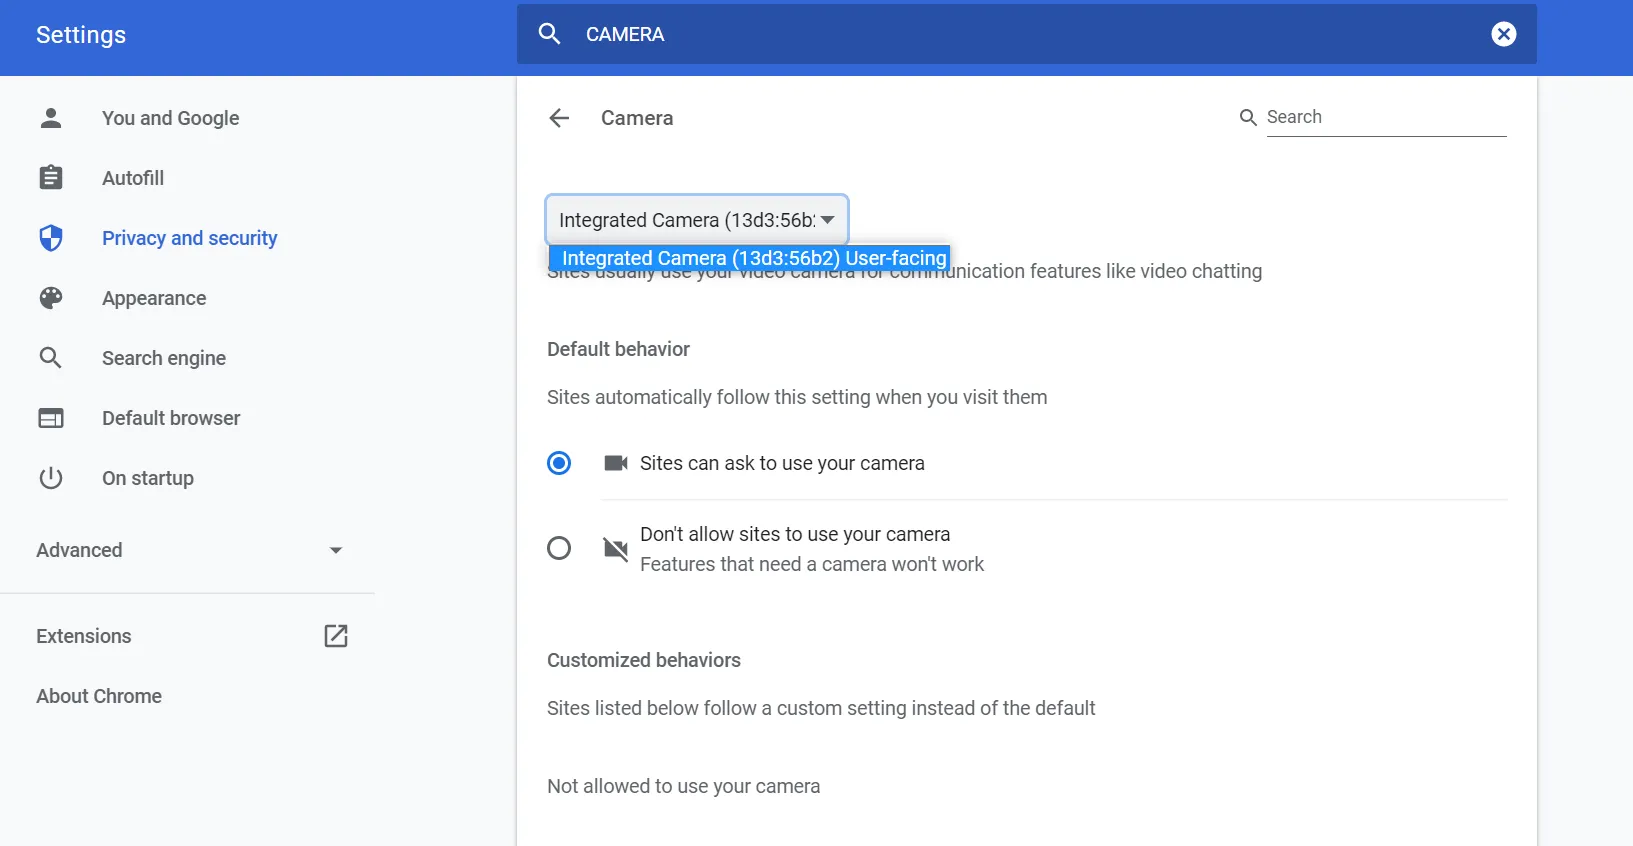
You should now be able to carry out your online webcam test.
Enable your web browser to use the camera
For certain operating systems like the macOS, you need to grant the browser permission to access your camera.
- To do that, go to System Preferences.
- Look for Security & Privacy from the options below. You can also search for it.
- Now, look for the camera and click on Google Chrome to ensure that it can access the webcam.
Issues relating to an external webcam
If you are using an external webcam device, you can test the it by checking how it works on different platforms.
In case of external webcam, you will need to check whether it is compatible with other platforms and programs.
-
To test whether your camera device is operating properly, you can test it on FaceTime & Photobooth on MacOS, Skype on Windows, or Zoom and Google Meet.
-
If it does not perform as it should, double-check that the unit is properly installed. If all your installations are in order, your driver is most likely the source of the problem. Check to see if the driver is installed correctly and is updated.
Update your driver
If you are using a Windows device, do the following:
- To get started go to the Control Panel and click on Device Manager. You will find it next to Device and Printers.
-
Here, select the webcam device that you intend to use.

- Now, click on Update driver.
If your operating system is macOS, here is what you need to do.
If you are using the built-in camera, you can check your system software update info by doing the following:
- Click on the Apple icon. You will find at the top left corner of your PC.
- Click on About This Mac. Then select Software update.
If you are using an external device, you will have to examine the device’s instruction manual. You can also contact customer service, but before doing so, make sure to thoroughly study their website. There may be a product software update to install there.
Problems related to work computer
Your system may be unable to access your webcam if you are working on a company device.
If you operate in an environment where corporate firewalls have been enabled across all PCs and devices, your system may not be able to let your device to use the camera.
Approach your company’s IT personnel for help to ensure that the problem is caused by the firewalls.
We hope that all your problems relating to online webcam testing have been solved here.


