How to test a webcam online before starting your meeting or conference.
Several professionals are unable to physically visit office and customer meetings as a result of the Pandemic since they are limited to their residences. Because of this, online video calling has emerged as the solution of choice for productive home-based meetings.
Today, part of working from home involves participating in or making video calls for multiple events. Some people even like video calling and conferencing to keep up personal relationships. However, you must make sure that your device’s Webcam is in excellent working order in order to get the greatest results from it.
Ensuring your device is in working order prior to your meeting is an important aspect of video conferencing protocol. Your webcam is also included in that. When you’re able to simply check your webcam and correct those problems before a critical conference, there’s no need to experience unforeseen and annoying video errors.
To make sure your webcam works well there are various ways you can test your webcam so that you do not face any issues during your critical meeting.
All identified problems can be found through a Webcam test. For Mac and Windows systems, you can visit a number of free webcam testing websites. You may utilize the built-in camera software on Windows and macOS to see if the webcam is operational.
How to test your webcam in Windows 10?

1. In the Windows 10 taskbar, select the Cortana search box.
2. Enter “Camera” in the search field. The Camera App will appear.
3. Here on the right side of the screen, select Open by clicking.
4. In Windows 10, you can now access the Camera app from the Start Windows 10 menu in the lower left corner of your screen.
5. The webcam will launch immediately after typing “camera” into the search box and clicking on the result.
6. The Webcam activates and the Camera stream appears as soon as the Camera app starts. Keep in mind that in order for the Camera app to function, first-time users must provide permission.
How to test your webcam in MacOS?
Your Mac comes with a configured camera app, just like Windows. The most convenient approach to check your webcam is to use Photobooth and it is the easiest way to test your webcam. By using the webcam, you may take images and make films with this program. Follow these steps to test the webcam in your MacOs:
- First at bottom of the screen, in the Dock bar, select the Finder macOS icon.
- Now from the menu on the very left-hand side, select Applications.
- Search for Photo Booth in the Applications folder. The feed from your web camera will be shown.
- If you’re using an external webcam, select Camera from the drop-down menu in Photo Booth by pointing your mouse at the menu bar at the beginning of the screen.
How to test your webcam in Microsoft Teams

If you are working with your teammates and decided to opt for the meeting using Microsoft teams. Here also you can test your webcam in Microsoft teams by following these steps:
Step 1: Launch the desktop version of Microsoft Teams.
Step 2: Click the Settings and More icon, which resembles three dots, in the top right corner of your screen. Then, again from the drop-down menu that displays, choose Settings.
Step 3: Choose Devices from the Settings menu. Next, activate your webcam.
Step 4: Select the Make a Test Call option under the Devices section.
Step 5: To check your camera and microphone, create a brief message with the help of the Teams Echo chatbot. Your camera stream will initially appear in the middle of your screen, but as you capture your voice message, it will shift to the bottom right corner.
How to test your camera in Google meet?
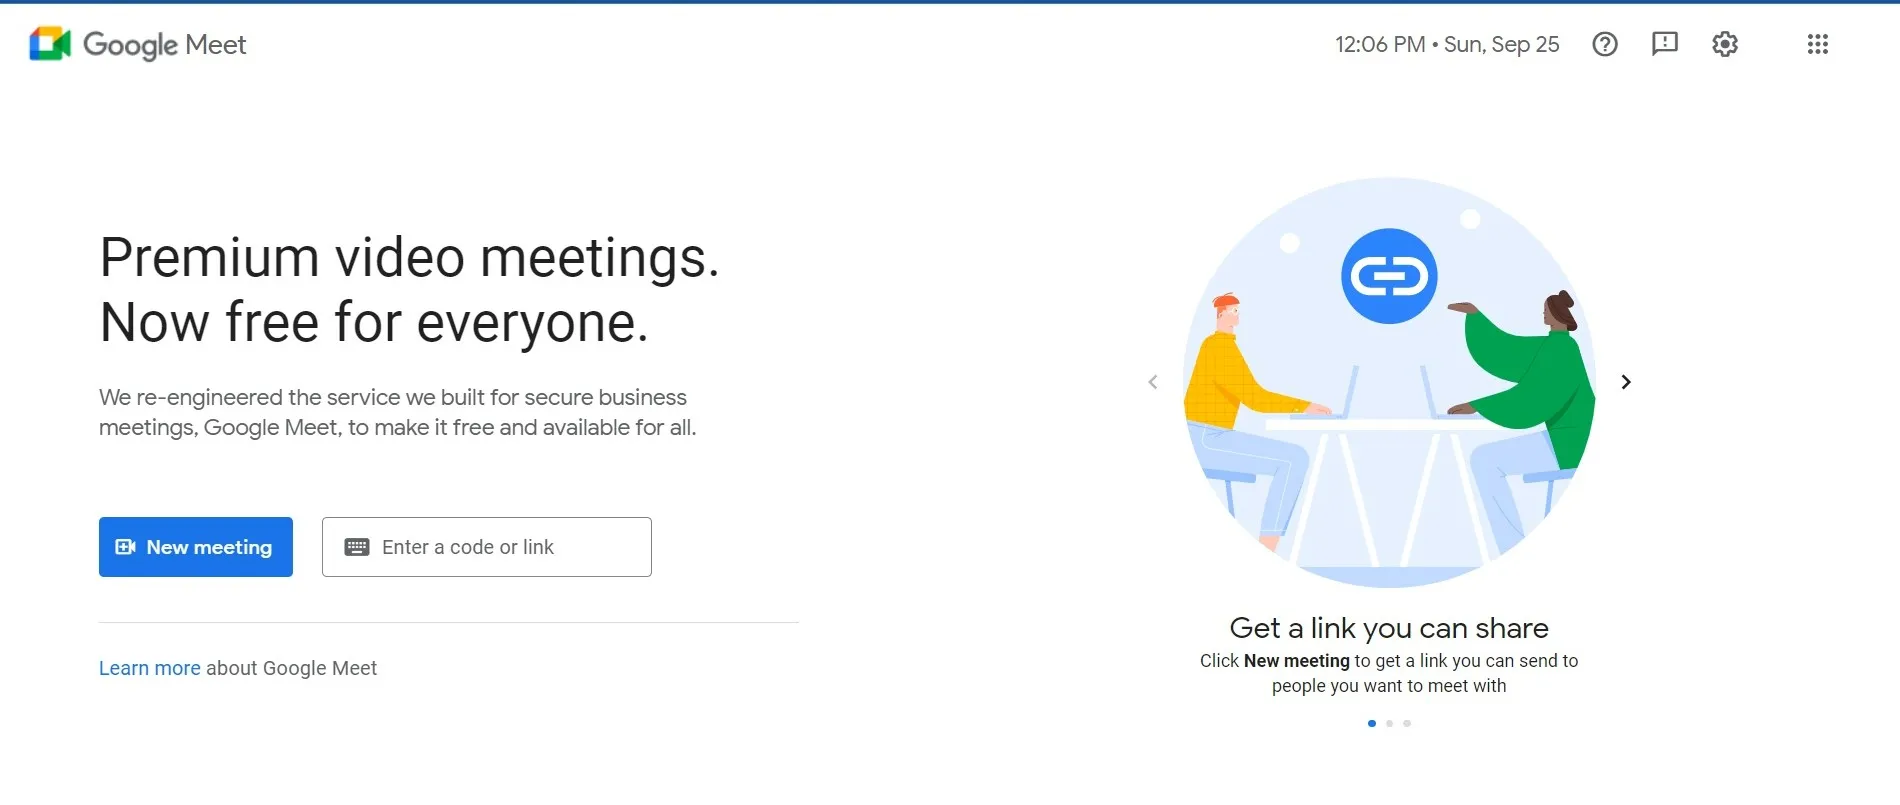
When you’re going to enter a meeting, Google Meet’s webcam testing function only appears. Here’s how to use it, whether you’re entering an existing meeting or setting up a new one simply to utilize the platform:
Step 1: If you are not already logged in, do so by logging into your Google account. Visit meet.google.com after that.
Step 2: Choose Schedule a Meeting for Future under New Meeting when you click on it.
Step 3: Save the meeting’s auto-generated link, then launch a new tab. Copy and paste this URL into your browser’s address bar. You will be directed to a Ready to Join? page as soon as you click the meeting invite.
Step 4: If your webcam is active, you can get a sample of your video on the “Ready to Join?” screen. By selecting the Test Your Video and Audio menu, you can also evaluate both webcam and audio.
How to test your Webcam in Zoom?

If you are using the Zoom platform for the meeting then this platform also lets you test your webcam prior to the meeting. Given below are steps to test the webcam in Zoom:
Step 1: Start the Zoom desktop application first.
Step 2: On the home screen, click on the setting in the upper right corner
Step 3. Click on the video.
Step 3: Switch on your webcam in step four. The top portion of the screen should instantly display a sample of your camera footage.
How to test your webcam on Skype?
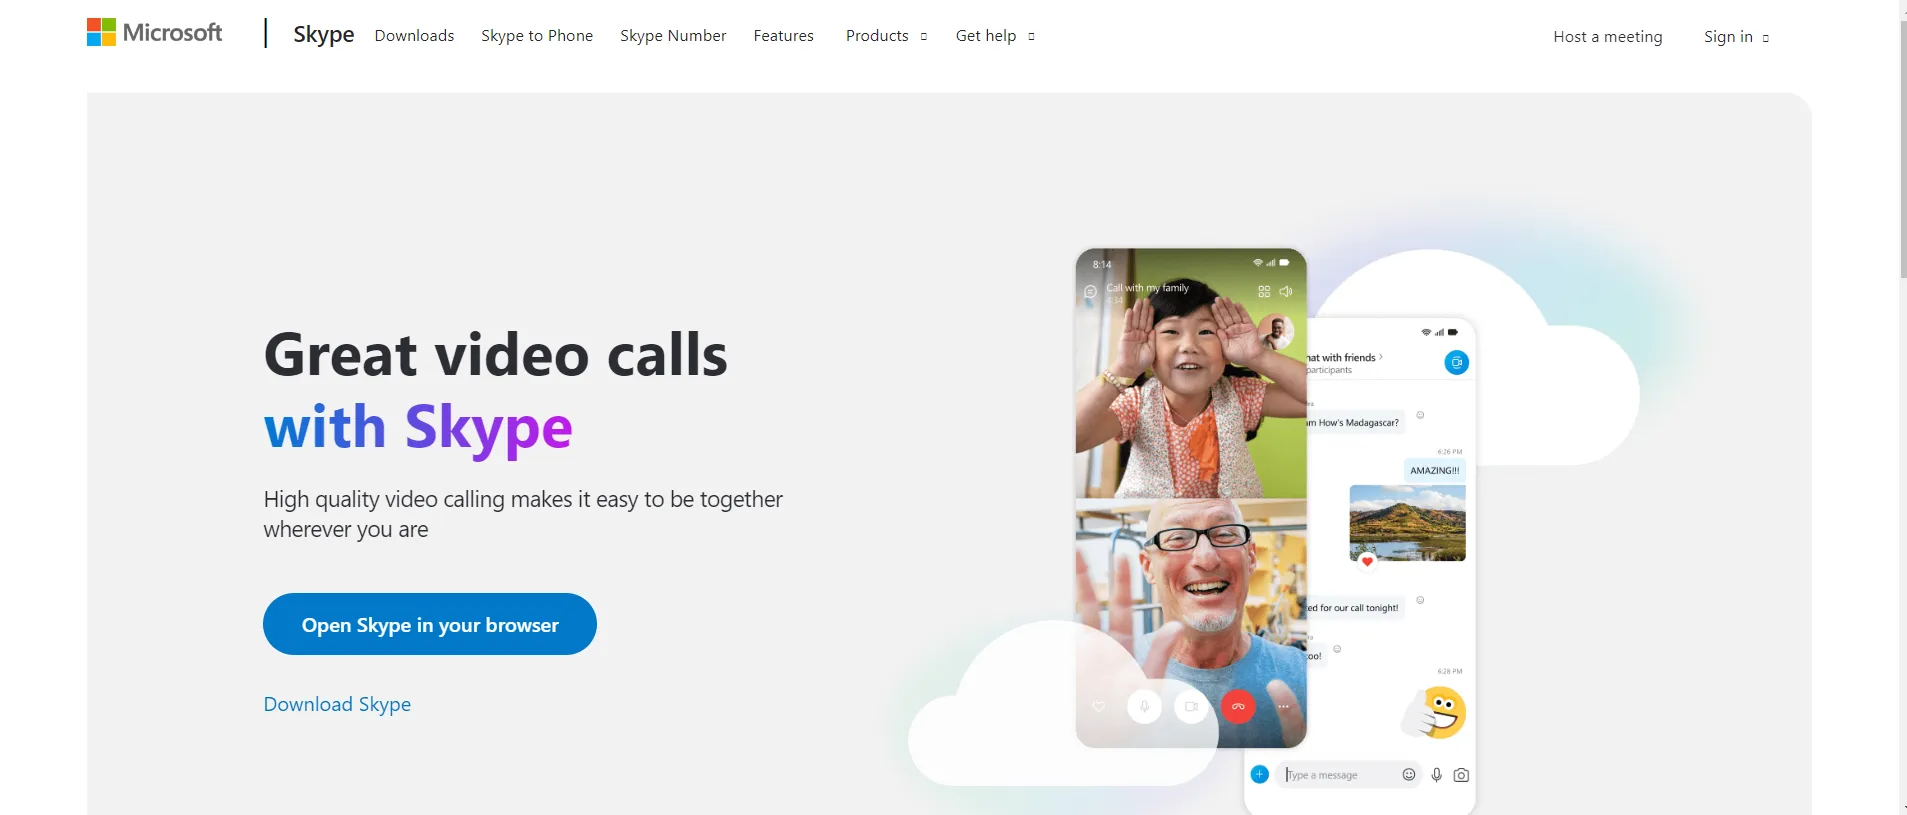
Another built-in program for video conferencing is Skype. Since it supports both video calling and texting, you may use it for both discussions and conferences.. Webcam testing is another function of Skype. This is how to apply it:
Step 1: First, launch the desktop version of Skype.
Step 2: Select the More icon located above your name in the upper left corner of your screen. It will appear as three dots. Then, from the menu that opens, choose Settings.
Step 3: activate your webcam. Select Audio & Video next from the Settings menu.
Step 4: A sample of your video will already be shown under Camera in the Video part.
Step 5: You can also adjust your webcam under the webcam settings to get a clear picture.
Other tools for checking your webcam
You can choose online webcam sites instead of using the various video calling platforms to test your webcam because they are much simpler and more practical.
Both the Windows browser and the MacOS browser make doing online webcam tests simple and fast. The free testing websites offer troubleshooting instructions for any web camera issues they discover.
One such online website to test your webcam is Test WebCams which is a free online tool for your troubleshooting the webcam. You may learn all the functionalities of your webcam with just one click thanks to the website’s user-friendly interface. The display makes a detailed description of the directions. The portal offers reliable information and fulfills the user’s expectations.
The procedure is made simpler and the data processing is quick thanks to the user-friendly display. The user has complete security over the camera information and other important information. Your data is secure because no documents are transferred because the website uses cloud servers. The tool operates entirely through your browser without using a server. so, your data is secure.
Here are the steps to be followed to test the webcam in Test WebCams:
Step 1: Visit testwebcams.com first
Step 2: Permit the web browser to use your camera.
Step 3. The outcomes will be shown on the right.
Step 4. After adjusting the parameters, such as the brightness, reload the results to view the difference.
Last but not least, using a webcam is the best option to minimize the chance of being overlooked online. It enhances an individual’s responsibility by giving them greater space to focus primarily. After reading this post, we hope you have a better understanding of the significance of testing cameras as well as the methods to test your webcam. Please let us know in the comments area if you still have any questions.